Hello guys, Have you been looking for a method to edit the Lightroom app, how to use the free Lightroom presets, and how to apply the presets on the Lightroom app? Today I will teach you how to apply the free presets on iPhone and Android devices.
What are Lightroom presets?
It’s no longer news what a preset is all about.
For beginners, photo editors who don’t have a lot of time, or designers who want to create a consistent visual style for imagery, a preset can be a great alternative to editing everything manually.
A preset is a free (or paid) add-on that comes with pre-determined settings for some of the different features in Lightroom. A preset has all the settings ready to create a certain type of visual with just one click. They can save photographers, editors, and designers a lot of time while helping maintain a consistent visual style.
How to Apply Lightroom Presets on iPhone
Do you want to boost the quality of your photos by utilizing presets in the Lightroom software on your iPhone? Although this appears to be a difficult undertaking, the whole procedure is not difficult.
With the Lightroom mobile app for iOS, you can use its editing tools to fine-tune images and use the paid or free presets to add unique background adjustments.
Don’t know where to download the Lightroom app? Check here for iPhone, here for iPad, and here for Android.
However, if you don’t know how to use presets on your iPhone while using the Lightroom app, our 2 step-by-step methods will help you accomplish this task without much difficulty.
Method #1: Using the DNG Presets file
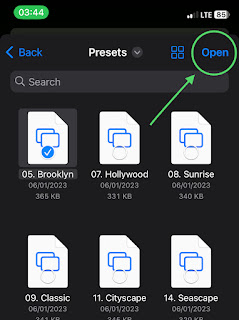
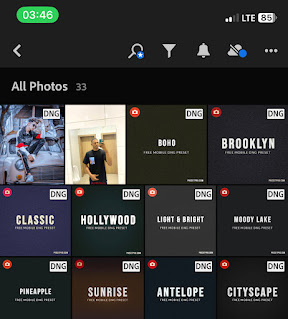
The presets you can use with Lightroom come in multiple file types, and (.dng) is one of them. Here are the steps for adding and using the (.dng) presets on your iPhone.
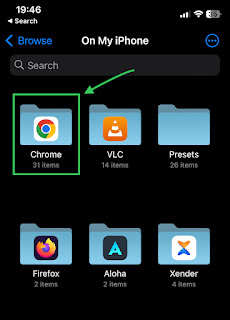
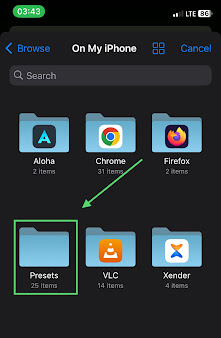
Firstly, you have to know the directory or folder where you saved the presets, and this depends on where you downloaded the presets from. For example, you downloaded from the Chrome browser, and it’s been saved to the download folder.
Step 1:
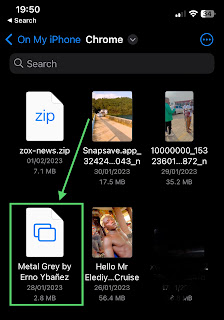
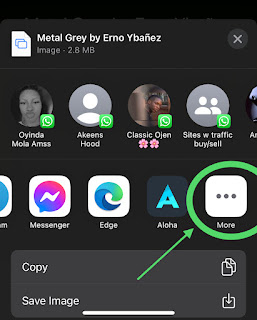
Go to the folder in which you have your presets; it can be in your documents, preset folder, downloads, or any folder in your file.
Step 2:
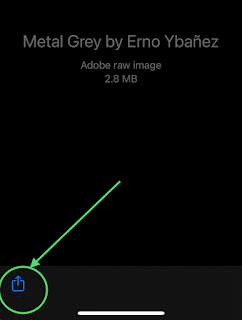
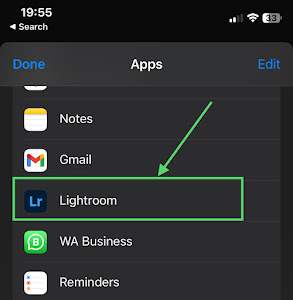
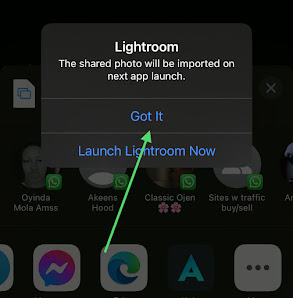
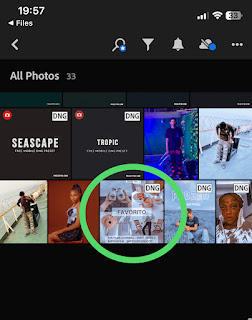
Locate the preset and open it. Just right below, you will see the share icon button to share the preset. Click on it to share.
Step 3:
Step 4:
Step 5:
Step 6:
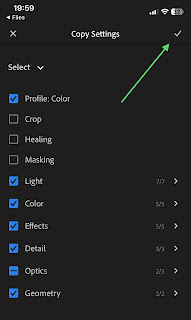
I just taught you how to copy the preset settings. After teaching you other methods of copying the preset settings, I will explain how to apply them to your pictures below this post.
Method #2: From Lightroom App
Step 1:
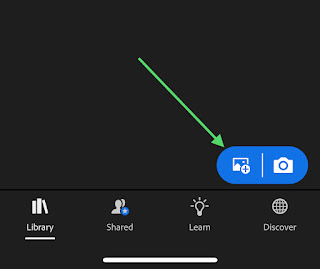
Step 2:
Step 3:
Step 4:
Step 5:
How To Apply Lightroom Presets: A Step-By-Step Guide On How To Install Presets
One good thing about saving presets to your user preset list is that you don’t have to always copy preset settings before pasting them on your pictures.
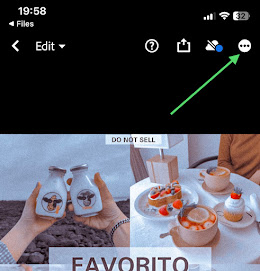
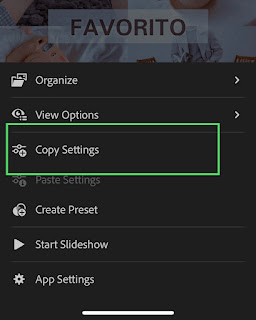
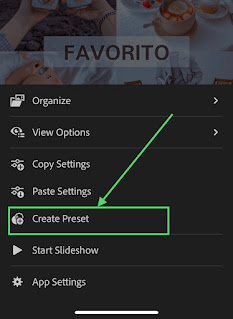
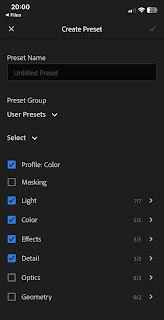
To save the preset to your preset list, you have to go to the preset you want to save. Follow my steps on how to copy preset settings, but this time you are not copying the preset settings. You are to select “create preset” to save the preset to your preset list. Follow the screenshots below.
Please give the preset a name to remember when saving, because this is the name you see when choosing from the list to add to your picture.
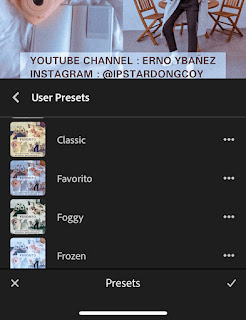
How to apply presets from your user preset list to pictures
If you have already added so many presets to your preset list, it is easy to apply and switch from one preset to another to know which one best suits the picture you are editing.
When you finally select the preset that best suits your picture, click the mark button to apply, and then save your picture by exporting it to your media or gallery.
How to apply presets to pictures
- To start with, you must have the preset you want to take its edits from o add to your pictures.
- After getting preset, use the method above to add it to your Lightroom app and copy the settings
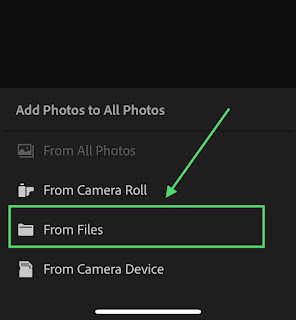
- Now import your picture to the liLightroompp too same way you added the presets to the liLightroompp
- Either of the 2 above methods, by sharing to the app or importing from the app
- Open the picture in the liLightroompp
- Click on the 3 dotted icons, the same one you clicked on when copying the preset settings
- Now click on the paste instead of copy since you have already copied the settings from the preset
- Or use the above method of using presets from the preset list to switch between presets till you find the best that suits you.
Join Our WhatsApp group/Community
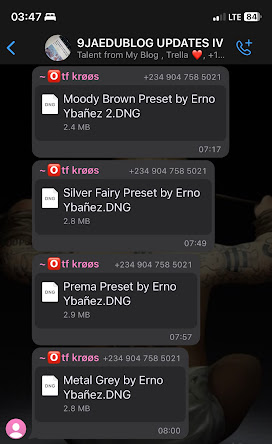
This is a platform where we share presets and updates for free, don’t miss out on our updated presets and also meet other people who also have an interest in using presets. You can share your thoughts and experiences with presets. This is a platform where you can also share presets you have in exchange for other presets from people all over the world. So why wait? Join our WhatsApp group today.
WhatsApp group link: https://chat.whatsapp.com/K5CEb72O14j5M3oqOhtNsQ
Note: This tutorial is almost the same as editing on Andriod devices too, but you can learn how to edit and use presets on Andriod devices here.
Summary
In this guide on how to use presets on iPhones, we’ve discussed adding (.dng) presets to the Lightroom app and using them to improve the quality of your pictures. We hope one of these methods has worked for you, and you can now turn your pictures into masterpieces.
Kindly share this post to help others too. Also, drop a comment below if you have any requests or suggestions or want to be added to our Lightroom group.
What is a Lightroom preset?
A preset is a free (or paid) add-on that contains pre-set parameters for several of Lightroom’s functions.
Who is Erno Ybañez?
Erno Ybañez is a Filipino video creator who specializes in creating Lightroom presets and selling them for a lower price on his YouTube channels, Instagram, and Facebook pages.
How do I download and install a preset for free?
This guide has been made available for free download, we also explain the steps to download and install the reset




Thank you so much for sharing this article on applying lightroom presets. I needed it so much for my social media.
You are welcome, kindly share the post to your friends using the social share buttons. Also check our latest posts on presets
Please I need more presets dng for light room
Join our WhatsApp group, link is in the post
They haven’t approve me since all this days
Hold on, don't worry you will be approved together with others, they are some amount of pending request we get before approving members.